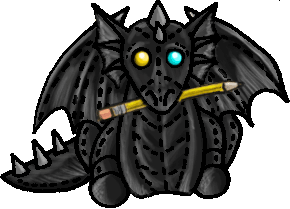
Hi! Welcome to my impromptu Photoshop Tutorial! I borrowed plushie Newy for a while to draw the pose, and she kept running off with my pencils. Fortunately, she held still for a little bit so I have a pose to demonstrate with.
Jhereg's PS Pose Tutorial | Page
1 - Scanning | Page 2 : Preparing to Colour
| Page 3: Creating the Colour Layer | |
|
Hi! Welcome to my impromptu Photoshop Tutorial! I borrowed plushie Newy for a while to draw the pose, and she kept running off with my pencils. Fortunately, she held still for a little bit so I have a pose to demonstrate with. |
Welcome to my pose tutorial. This tutorial is presuming you use Photoshop (though I am using 6.0.) The tools and options are standard, and I will not being showing you anything so complex that you cannot do them in versions 3.0+. I do not use Photoshop Elements to know if these are standard features in the watered down Photoshop. Chance are there is nothing here you won't be able to find in PSE. I will not use Paint Shop Pro, so if you use that program, there are other tutorials out there for you.
1) The first thing you need to do is draw your pose. This can be done on paper and scanned, or drawn directly to the PS using the mouse/tablet/pen/space age beaming device (ehehhehe) - whatever feels best for you. It doesn't matter what you draw it on, other than it a uniform color. The color will be stripped out on the scan. You will notice I used a post-it note for this drawing. I pencil a pose with my trusty 2B standard issue pencil, ink the lines with a permanent fine tipped marker, then erase the pencil lines with an eraser. If you draw the picture directly in PhotoShop, the pencil tool is your best bet in order not to get gray hazy lines (aliased) like you would get with the brush.
2) When scanning, set the type to Black and White Bitmap (or the equivalent in your scanning software) at 72 DPI (you don't want it any more than this as 72dpi is screen (monitor) resolution. Setting it higher will only make more work for you later and give you loss of detail when you have to smoosh the file back down to 72.


